First download a copy of the latest SMS.ELF. The latest release is available at http://home.casema.nl/eugene_plotnikov/ also, some older versions are held at http://ps2dev.org/ps2/Projects. Developers can download the source from svn://svn.ps2dev.org.
Now copy this file to your memory card (memory card 0). The recommended (and probably easiest) way to copy the ELF file to your PS2 is using FTP.
You'll need an FTP server running on your PS2, and an FTP client running on your PC, with either a crossover cable between the two, or patch cables linking them both to a network switch.
The recommended (and again, probably easiest) PS2 FTP server to use is the built in FTP server of 'unofficial' LaunchELF. You can get the BOOT.ELF for uLaunchELF from here: http://www.ps2-scene.org/forums/showthread.php?t=37242.
Assuming you've already copied the BOOT.ELF onto your memory card using one of the exploit installation techniques, it is very easy to start the FTP server.
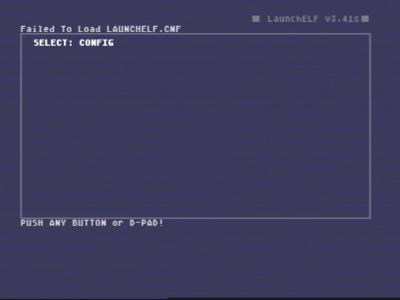
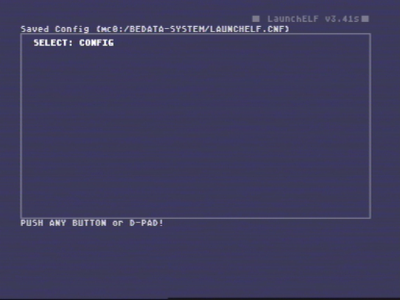
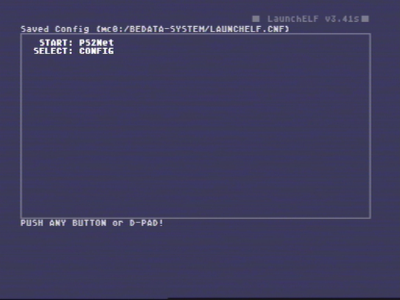
Turn on your PS2 and activate your exploit/modchip; first time you use uLaunchELF, it will look something like this:
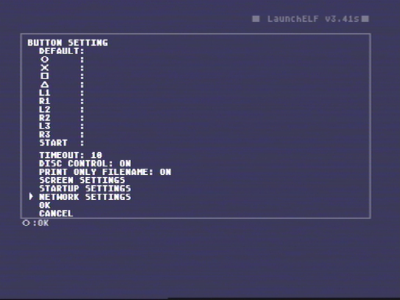
Press SELECT, go to Network Settings, then press O
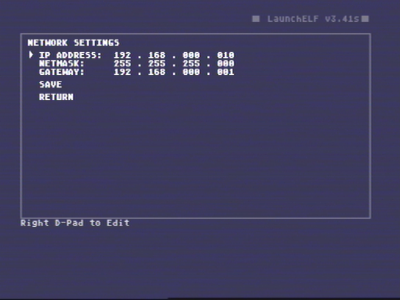
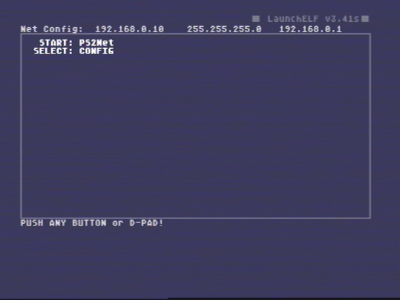
The next screen allows you to change the network settings using your controller pad. The settings are stored in the file mc0:/SYS-CONF/IPCONFIG.DAT.
You can change the IP address of your PS2 from the default 192.168.0.10 to anything you want, but it must be on the same subnet as your PC. For more information on network settings, please see the Section 2.6.1, “ Network Configuration ” section. You can edit the values using the D-pad.
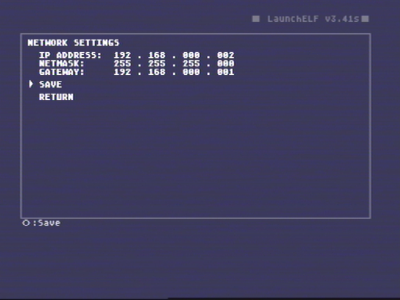
Once you are happy with the settings, select SAVE and press O:
On the main screen select OK and press O:

You should see a message saying that the configuration has been saved:
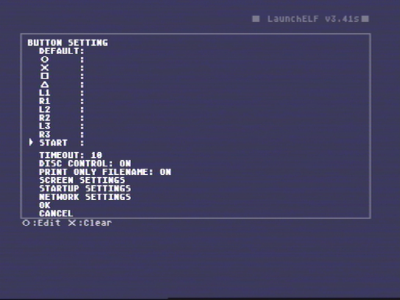
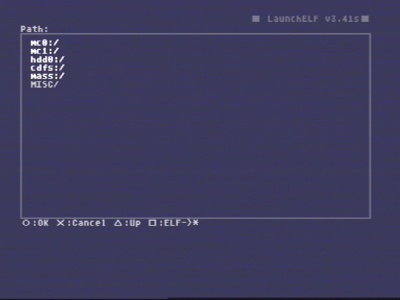
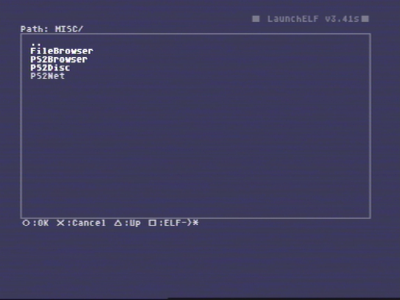
Now you need to assign a button to launch the FTP server. Press SELECT, then move to any entry on the list (here, we've used 'START'). Press O, and navigate to MISC, then PS2Net.
Note
PS2Net is the name of the FTP server program that comes built in to uLaunchELF's BOOT.ELF file.
Once you've pressed O to confirm, then OK, and O again, you'll see the following screen:
You'll now see the above screen every time BOOT.ELF starts up.
This means that if you press START, PS2Net will be launched, and if you press SELECT, you will go to the config screen.
Tip
You can assign many buttons on this screen. You will probably want to later assign SMS to one of the buttons. If you assign anything to DEFAULT, it will launch automatically after a pre-set delay.
Now press START to launch PS2Net. The following screen is shown while your FTP server is running:
You can check that the connection between the PC and PS2 is working by
starting a command prompt on the PC (start->run, 'cmd' <enter>).
Then type ping 192.168.0.10 (or whatever the IP
address of your PS2 is). If it's working, you'll see
reply from ... shown on the screen.
Now that you've got your FTP server running, skip ahead to Section 2.3.1.3, “ Starting the FTP Client ” for how to upload SMS to your memcard.
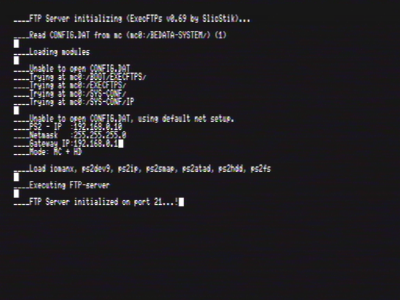
If you are not using uLaunchELF, you'll need to load a seperate FTP server application onto your memory card such as EXECFTPS.ELF. Activate your exploit, and boot to your boot browser (e.g. LaunchELF). You can either configure one of the buttons to start EXECFTPS.ELF directly, or navigate to it using the filebrowser, then run it from there.
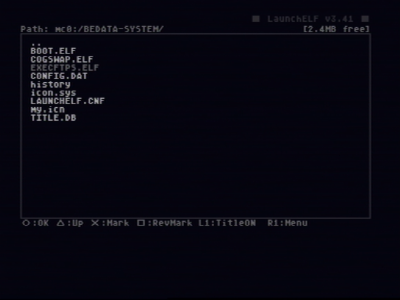
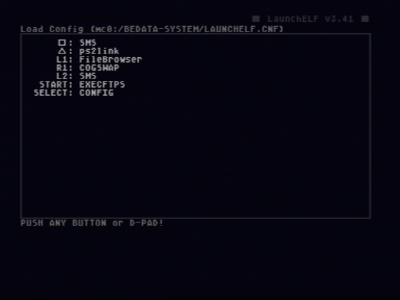
Figure 2.14. Starting ExecFTPs using a configured button (the configuration above shows that by pressing start on controller 1, ExecFTPs will be started).
Either way, once you've got the FTP server running, you should see your TV screen show something like this:
You can check that the connection between the PC and PS2 is working by
starting a command prompt on the PC
(start->run, 'cmd' <enter>). Then type
ping 192.168.0.10 (or whatever the IP address of your
PS2 is). If it's working, you'll see
reply from ... shown on the screen.
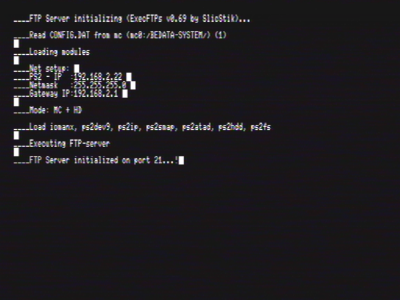
The configuration settings for ExecFTPs are stored in mc0:/BxDATA-SYSTEM/CONFIG.DAT, in the form:
<ps2_ip_address> <ps2_subnet_mask> <ps2_default_gateway>
If you do not have a mc0:/BxDATA-SYSTEM/CONFIG.DAT file, ExecFTPs will automatically use the following defaults:
|
PS2 Settings |
PS2 IP Address: | 192.168.0.10 |
|
Subnet Mask: | 255.255.255.0 | |
|
Default Gateway: | 192.168.0.1 | |
|
mc0:/BxDATA-SYSTEM/CONFIG.DAT | file not created |
If you want to use a custom IP configuration, you will need to modify the file mc0:/BxDATA-SYSTEM/CONFIG.DAT. However, if you intend to use FTP to copy a custom CONFIG.DAT file to your PS2, then you'll need to get it working with the defaults first. For more information on network settings, please see Section 2.6.1, “ Network Configuration ”.
Note
ExecFTPs stores its settings in mc0:/BxDATA-SYSTEM/CONFIG.DAT. This is different from the file mc0:/SYS-CONF/IPCONFIG.DAT where SMS and uLaunchELF/PS2Net store their settings.
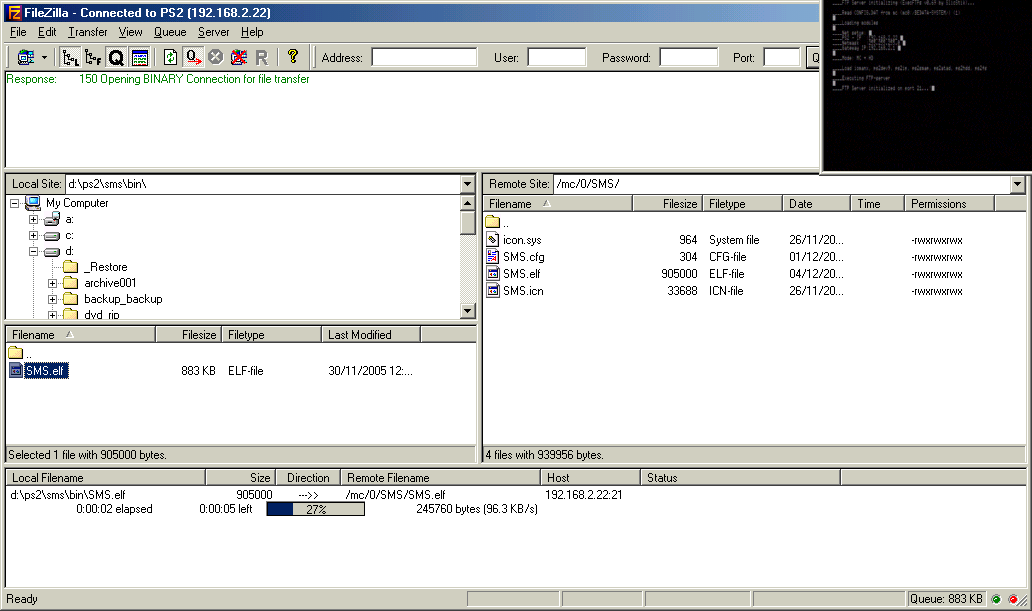
Once you've got the FTP server working, and successfully PINGed your PS2, start your FTP client. Lots of people seem to be recommending FlashFXP (http://www.inicom.net/pages/en.ffxp-download.php), but I was happier with the free (and non-nagware) GPL FileZilla (http://sourceforge.net/projects/filezilla). Not all FTP clients will work. For example I couldn't get FTPexplorer to work for some reason.
Load the FTP client on your PC (example is FileZilla), then type in the IP address of your PS2 in the 'Host:' box. Some people have also recommended that you need to enable Passive (or PASV) mode. I've found that this isn't necessary, but by all means go ahead if you like, the setting is accessed by clicking the 'Advanced' button on the form below.
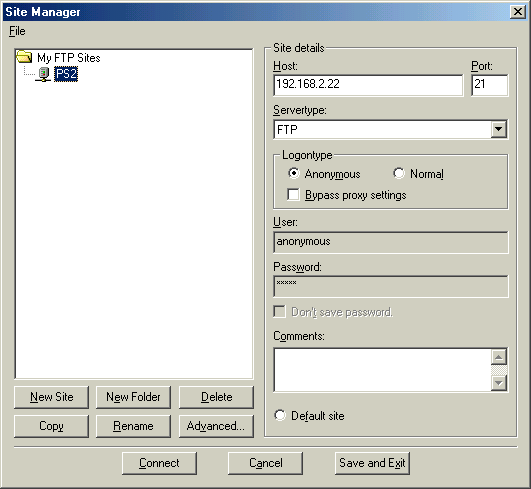
Figure 2.17. Setting up the IP to connect to (note that the default IP address for the PS2 is 192.168.0.10).
When you are ready, click 'Connect', and after a blur of messages at the top of the screen, you should see something like the following page:
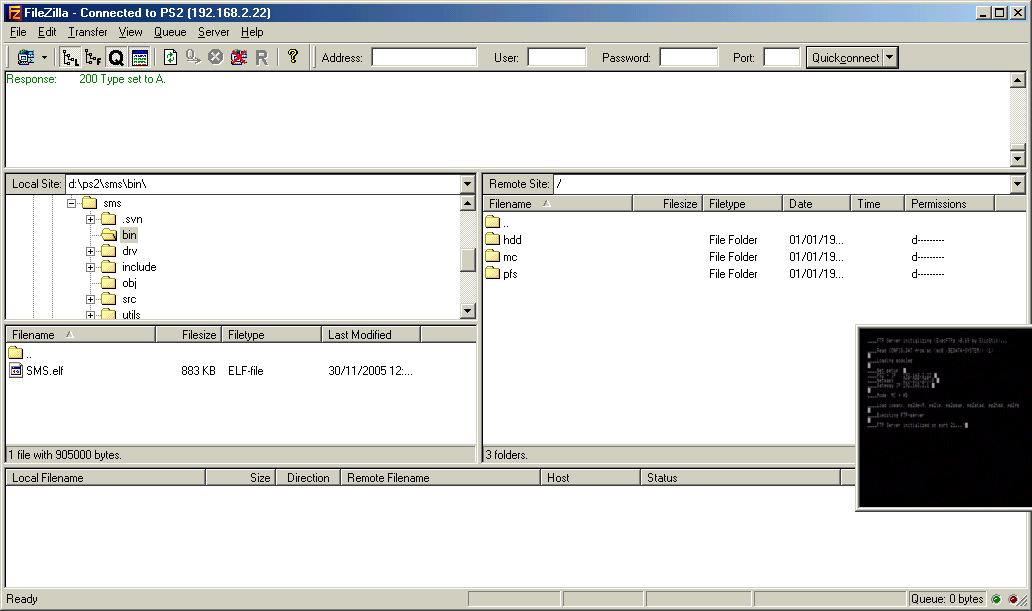
In the 'Remote Site' section you should see 'hdd, mc, pfs'. These are the storage devices on your PS2. Hdd is the hard disc drive, and mc is the memory card. (if you don't see anything, try pressing F5 to refresh). Double click mc, then '0'. The two memory card slots are accessed via /mc/0 and /mc/1 (slots 1 and 2 on the Playstation2).
I'd recommend putting your SMS.ELF in a folder called 'SMS', as the settings will also be stored in /mc/0/SMS, but you can put it where you wish. Right click to create a new folder if necessary.
Navigate to your downloaded SMS.ELF in the local site browser, then drag the file from the left window to the right window. You should see a progress bar as the transfer completes:
Congratulations, you've now copied the SMS executable to your memory card. Close down your FTP client then restart your PS2.